Todays post is another chapter of my “How-To” Guide. This one is a long one, be warned & grab a snack. This is something many women ask me about frequently, false lashes! This is a very important one because once you start wearing lashes your makeup never looks complete without them! Don’t say I didn’t tell you. Many women stay away from lashes because they are “hard” to put on or they “don’t look right” so this post will hopefully give you all the information you need.
In this post I’ve also reviewed a new favourite pair of lashes & lash glue that I received from ESQIDO mink lashes so keep reading!
Lashes For Your Eye Shape
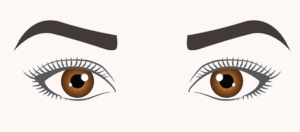
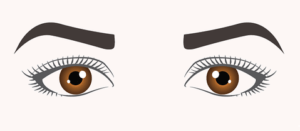
Before we dive into actually putting on lashes, lets talk about different eye shapes. Knowing your eye shape is crucial when deciding what lashes to wear. Different lash types flatter different eye shapes. The problem many women who don’t like lashes have, is that they wear lashes that are unflattering to their eyes.
Almond Eyes
This eye shape is the most versatile of the eye shapes, they are the “oval face shape” of eyes & most lash styles will compliment them. Almond eyes are wide in the centre where the curve of the iris’ are hidden by the lids & have a slight point on the ends.

Hooded Eyes
This eye shape is characterised by having a little more skin above your crease. If when you put on eye shadow it practically disappears when your eyes are open, this is you right here. Hooded eyes are most flattered by lashes that are more full in the centre that open up the eyes in the centre giving the illusion that the eyes are wider & more open.

Close Set Eyes
If the distance between your nose & your eyes is shorter than the width of one eye, you fall into this shape. With close set eyes the goal is always to lengthen & lift the eyes. Avoid styles that are heavy in the inner corners & focus on lashes that have longer lash lengths from the centre to the ends to accentuate the outer corners of your eyes.

Down Turned Eyes
This eye shape is practically the same as the Almond eye with a slight downward tilt at the outer corners which makes the upper lid appear longer than the lower lid. For this eye shape the goal is to extend that lower lash line. Lashes with the longest hairs in the centre create a flattering & lifting effect on downturned eyes.

Monolid Eyes
Monolid eyes have no visible crease so to create more openness, styles with multiple layers & more length in the outer corners give the illusion of a longer & more open eye shape.

Round Eyes
If you can easily see most of your iris’, you have round eyes. To create balance for this eye shape use curly, wispy lashes. These lashes because of their curls, provide lift to the upper lid.

Upturned Eyes
For this eye shape, the outer corners point higher than the inner corners. These are the perfect candidate for a cat eye! To balance up turned eyes, use lashes that are full & thick throughout the lash however to create the ultimate cat eye, use lashes that have the most volume towards the outer corner.

Deep Set Eyes
You girls have a very prominent brow bone which allows you a lot of flexibility in choosing lashes. You can use very dramatic lashes & they won’t over power your eyes. Lashes with extra length & volume will flatter these eyes best.

Prominent Eyes
These eyes standout all on their own. More natural lash styles with a high curl can be used to provide lightweight enhancements to these eyes.

ESQIDO MINK LASHES
Now that we’ve covered most of the common eye shapes lets get into these lashes! I recently received my very first pair of mink lashes from ESQIDO. The team was also kind enough to send me their Companion Eyelash glue to try out (it retails for $10.00). The packaging of these lashes is absolutely gorgeous, the box is textured & feels very luxurious. The box is not flimsy & will definitely keep the lashes protected from dust & damage.
I chose the “Stephanie” mink lashes (which retail for $32.00) & they are SO beautiful & soft to the touch! They are described as featuring “voluminous v-shaped clusters that gives your eyes a lifting effect, and a beautiful wispy look”. Just looking at them I knew I would love them. I have big Almond shaped eyes for (even though I also have hooded lids) so most lashes work for me but I love full, voluminous & long lashes.


These lashes are made with a soft, hand crafted cotton band so they did not have the traditional stiffness that synthetic lash bands typically have.
For synthetic lashes you have to wiggle them a little bit with your hands to get them to be more flexible & able to match your eye shape when applying.
Now lets put them on shall we..
Step 1 – Apply Mascara
Before putting on your lashes you always want to apply your favourite mascara. This will help with blending your lashes with the falsies.
Step 2 – Measure Your Lashes
Not all false eyelashes will fit all eye shapes straight from the package. Some may be too long so you want to take the lashes out of the packaging and place them gently on your lash line to measure them up. (Remember to wiggle them for a few seconds with your hands by holding on to both edges to release stiffness & allow flexibility)
The lash strip should start where the bulk of your natural eyelashes start. Starting too close to your inner corner can cause irritation. Make a note of where the excess starts to hang over the end of your outer corners & snip it off at the band. Always cut the outside edge, cutting the inner edge will cause the lashes to begin too heavily at your inner corner & weigh down your eyes.
Step 3 – Apply Lash Glue
After removing your lashes from the packaging with a pair of tweezers, apply a layer of lash glue to the band from end to end. After applying glue wait a few seconds for the glue to become tacky before trying to apply.

Step 4 – Placing The Lash
Place a mirror in a position that allows you to look downwards while applying the lashes. Then, use your tweezers (or fingers if you don’t enjoy living dangerously) to place your lash onto the centre of your lashes as close to the lash line as possible.

Step 5 – Positioning
After putting your falsies in the centre of your eye you want to properly position them to adhere to the inner & outer corners. If your glue is tacky enough they shouldn’t shift from the centre of your eyes while you tug them into place at the corners.

Step 6 – Blending
This last step is to ensure there is no visible difference between your lashes & your falsies. I use my fingers to “squish” the falsies & my natural lashes together. This step also ensures your lashes are sitting directly on your lash line. You can also lightly use a (clean/disposable) mascara wand. Using an actual mascara wand could alter the shape/volume of the falsies so I avoid using them.

Before & After Lashes
In the photo below you can clearly see the difference that lashes make to a makeup look. Adding lashes can turn any look from ordinary to super glam in a matter of minutes!

Final Thoughts on ESQIDO Mink Lashes & Companion Eyelash Glue
I adore these lashes & I’ve worn them at least 4 times already since receiving them. They are so easy to apply & are clearly of good quality. I can see myself getting many many more uses out of them which I am happy about because i love how they look on my eyes! Also when I checked out their site & was choosing the pair I wanted it was SO hard! There are so many gorgeous styles to choose from. The prices range from $24.00-$32.00 with most styles being priced at $29.00 which is on the pricey side when compared with other brands but the quality is impeccable so if you’re looking to splurge on some high quality lashes, look no further!
The Companion Eyelash Glue is latex free and described by ESQIDO as being gentle & perfect for sensitive eyes while providing all day hold. I had no problems with lifting or having to reapply glue & as for being great for sensitive eyes, I can definitely confirm this claim. Many lash glues tend to make my eyes either feel a “tingling” sensation or even burn a little bit. I know I shouldn’t have kept using them but my only other option was to not wear lashes & we all know that was never going to happen 😂 . So thank you to ESQIDO for this lash glue, I will forever be a fan. In addition to being great for sensitive eyes, the Companion Eyelash Glue has a fine tip wand which makes it easy to apply the glue to the lash band.
Re-Wearing Lashes
Lashes can definitely be re-worn, I re-wear lashes until they look absolutely worn out & terrible. After removing your lashes, use a cotton ball soaked in either makeup remover or a little coconut oil to wipe the band of the falsies to remove the glue. If glue remains after this step, you can then use a pair of tweezers to then pick off any excess glue that has not come off. Replace your lashes in their casing & they will be good as new to re-wear in the future. Avoid leaving your lashes to lay flat/straightened. They need to be put back in the packaging to retain their shape.
Hope you enjoyed this guide on false lash application & review of my ESQIDO products! For more of my “How-To” guides click the link below!
Until next time my loves,
xo Justine-Renee
Don’t forget to subscribe to the blog below & follow me on instagram for more pictures!
Instagram: @justinerenee__

**Disclaimer – I was sent the ESQIDO products for review purposes by the brand however all opinions shared are my own & not influenced in any way.**
**All graphics demonstrating eye shapes were found on pinterest**